Whiteboard Interactivity
Combine Wixie and your whiteboard to bring your curriculum into focus
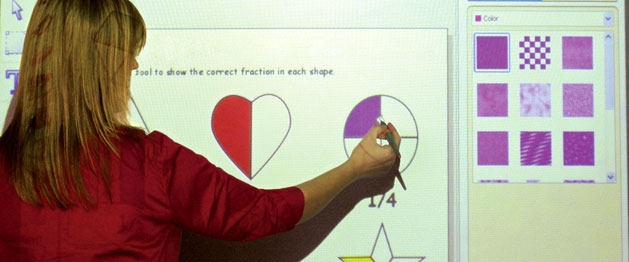
If you have been to an educational technology conference recently, you probably noticed all of the interactive whiteboards. You may even have one in your classroom. How do you use it beyond a simple projection screen and delivery mechanism? How can you use it to change your instruction and to improve student learning?
If you are already familiar using Wixie as a student learning tool, using it for instruction with an interactive whiteboard is easy. Using Wixie on your interactive whiteboard helps you model its effective use to communicate ideas and information. Having students interact on the whiteboard gives them the chance to practice using the tools and locating resources in Wixie before embarking on their own projects.
Assess for Understanding
The easiest way to begin using Wixie on your whiteboard is with an activity. You can use Wixie activities to assess prior knowledge on a topic or assess for understanding after you have completed a unit of study. For example, if you open the Living or Nonliving activity, you can work together as a class to sort the objects into the correct category. Start by asking one student to come up to the board to sort an object into the correct category and then explain his or her choice. A student might respond, “We learned that living things breathe, eat food, and make noise. A dog barks, pants, and eats treats.”
Wixie contains a wealth of activities you can use in this way. You can open a life-cycle activity and have students drag stickers into each box to show the life cycle of an animal and use the text tool to add labels to each stage in the life cycle. Some activities allow for a more open-ended approach. For example, using the Trees in Season activity, you can have students use their hands on the board to paint what a tree looks like in each season.
Build Knowledge as a Class
You can also begin projects from a blank screen. If you are studying insects, work with the entire class to brainstorm and define the characteristics of an insect. Open a blank Wixie document and add a text box. Ask students to think about the characteristics of an insect. You may even want to start by adding a few stickers. The class can participate by adding words to the text box or by drawing several different insects and comparing them.
In a slightly different approach, ask students to list characteristics such as three body parts, six legs, hard exoskeleton, or antennae; add it to the list; and then draw it on the whiteboard. Ask another student for an additional characteristic, add it to the list, and have them draw it on the existing insect. At the end, the entire class will have created a new insect species they can color and give a scientific name. You might even have the class work together to write a descriptive paragraph to introduce this new insect species to the scientific world.
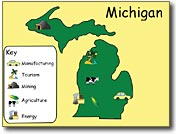
The same process works great for learning to make maps. Open a map of your state. Have students think about all of the food, materials, and services in your state. For example, in the Upper Peninsula of Michigan you will find mining and lumber, while the Lower Peninsula produces cars, corn, and cattle. Students each come up to the whiteboard and drag one good or service produced in the state to the location in the state where it is produced.
Explore the World Together
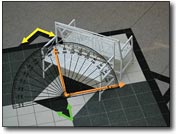
You can use photographs students have taken with a digital camera or found online to connect with your curriculum. If you are learning about angles, you can have students use a digital camera to capture examples of angles in the classroom, school, or sports fields. Use Wixie to open the images on your whiteboard and have students use the paint tools to draw the angles on the image. To determine whether the angles are acute, obtuse, or right, add the protractor sticker to the picture. Size it to fit the angle and take the angle’s measurement.
Publish Class Literature
Work on writing together to build literacy skills. In the early grades, create a class ABC book. First, brainstorm all of the words and objects students know that begin with the letter A. One at a time, have students use the paint tools or stickers to add that object to the picture. Then, create a text list of all of the objects that begin with this initial sound and record student voices reading the list. You can print out the pictures to create printed booklets or trading cards.
If you are reading a story to the class, you can have students illustrate while you are reading. Before each section is read for the entire class, assign one student to read it ahead of time. Work with this student to make sure he or she can summarize the chapter and can focus in on an important event in this part of the story. Then, when you are reading in class, have this student paint an illustration of an event from the chapter while you read it to the rest of the class.
When the book is complete, open all of the student illustrations. In Share mode, have students drag the pictures in the order they occurred in the story. This is a great time to focus on beginning, middle, and end. If you also want to focus on retelling, have each student who illustrated record a sentence that summarizes the chapter. Then, export the story as a video, podcast, or web storybook.
Wixie can help make your whiteboard truly interactive, engaging your students in the curriculum.


