Digital Camera Delights
Unleashing the magic of student photography
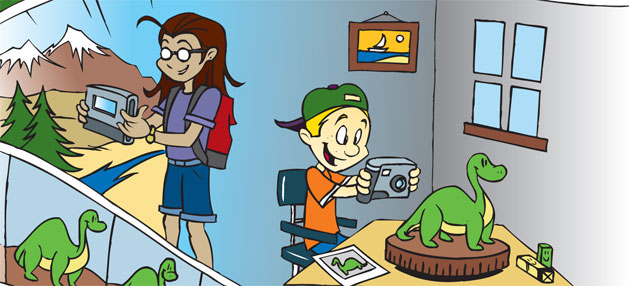
Digital cameras have huge potential for motivating students and can be used in a variety of ways. While they are useful for administrative tasks like seating charts and identification, the magic of digital cameras is unleashed when students use them to explore the world around them and communicate their ideas and understandings.
Digital cameras can be used to record information from a field trip to report back to parents and students. They can be used to capture and identify species found around the school and in local environments, or to make local history come alive by sharing “sights and sounds” of the cities we live in. Digital cameras can be used to capture frames of a clay animation explaining plant growth, or to create a time lapse of that ubiquitous bean plant growing from seed to maturity. Digital cameras can also be used to prompt writing in many forms: descriptive, poetry, persuasive, and more.
...the magic of digital cameras is unleashed when students use them to explore the world around them...
If you are new to technology and not quite comfortable with the camera yourself, give yourself some practice by taking lots of pictures of the learning in your classroom. Then, transfer the images to a folder on your computer and use Pixie or ImageBlender to run a slide show of those images. You can even add music and have the show run automatically, making it a perfect background for a parent night. If you have taken images on a field trip, or of a topic you are studying (like the life cycle of the butterflies you have in your classroom), you can run a slide show manually, so you can talk about each image with your students.
When you are ready to let your students take control of the camera, start small. You might make a student responsible for taking an image of everyone else in class, capturing the sights you see on a field trip, or finding the images for an image scavenger hunt. Teach your students how to transfer the images to the computer and run their own slide show. If you are comfortable being a “guide on the side,” you can designate a student expert who is responsible for teaching you and other students!
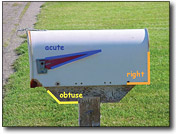
Taking pictures is just the beginning. Editing images, identifying items in an image, or taking an image to use in a presentation helps extend the reach of digital cameras in the learning process. For example, you could have very young students search for and take pictures of the shapes they see in the world around them. Once they have used the camera to capture the circle in the clock or the rectangle in the window, open the picture in Pixie and have them use the paint tools to identify the shape in the image. Older students can take pictures of symmetrical objects and identify the lines of symmetry, or take a picture of an angle and identify whether it is acute, obtuse, or right.
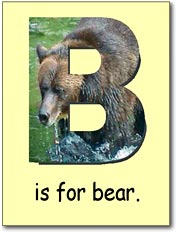
A digital camera can also help us reach the visual learners in our classroom as well as support English Language Learners. As primary grade students are learning the alphabet and initial sounds, have them use a digital camera to capture pictures of things that begin with each letter. You could then start the day with a slide show of the all the things in your classroom that begin with the letter “p”. Open the pictures in Pixie and use the Cool Word feature to create a cool letter – a letter that shows the picture inside of it!
Older students can use the same process for new vocabulary words. To help students remember the definition of the word, have them use the digital camera to capture an image of something that offers a clue to the meaning of the word. Open the image in ImageBlender and use the Cool Word feature to show the image in the word. Print each cool word and hang them around the room!
Digital cameras can also be used to study art styles. For example, after learning about what makes art Impressionistic – time of day, the fleeting moment, focus on the natural world – have students use a digital camera to take a picture of something that would be in an Impressionist’s painting. Bring the photo into Pixie or ImageBlender and apply the Oil Paint effect to transform it into a painting.
There is nothing students like more than being the star of the show. Once each student has taken a picture of themselves, the possibilities are endless. If you want to practice writing, have every student open their picture in Pixie and type a paragraph to introduce themselves. Combine all of the student images into a slide show so the entire class can get to know one another. You could also have students use the Stretch tool in Pixie or ImageBlender to transform their face and write a story using a prompt, such as, “After eating the green Jell-O at lunch, I started to feel strange...”
Photos in the digital world don’t have to be real. Students can transform themselves into an animal by selecting their face and pasting it onto an animal body they have drawn or a photograph they have downloaded from Pics4Learning. This is a great way to help them write about habitat, predation, and life cycles in first-person.
Students might also place themselves in a new location by combining their image with a new layer in ImageBlender. The resulting image could be a background for a presentation in which they narrate a tour through a foreign country or a visit to a monument you are studying. Digital photo editing can even let students visit a different time in history. Your students can become medieval knights, ancient philosophers, explorers, and more!
Digital cameras and digital imaging provide an endless list of classroom products you can share. Web pages, multimedia projects, presentations, and newsletters are great examples of how students can use digital images. There are also specialty papers you can use to make digital images tangible. You could use iron-on transfer paper to make t-shirts or even a project quilt, or use magnet paper, shrink paper, or window decal paper to create thematic displays.
The possibilities for implementing digital cameras to improve student learning are truly unlimited. If you begin to use your camera a couple times each week in different projects or activities, it will quickly become another essential teaching tool, and I promise that you won’t be able to stop finding new ways to use it!

Melinda Kolk is the Editor of Creative Educator and the author of Teaching with Clay Animation. She has been helping educators implement project-based learning and creative technologies like clay animation into classroom teaching and learning for the past 15 years.